There really is no overstating the importance a lead generation landing page plays in a digital marketer’s toolkit. Landing pages play a pivotal role in bringing marketers those all-important leads that are crucial for any businesses success.
With that in mind, it’s no surprise that the good people at Facebook decided to bring this aspect of marketing to their very own advertising services. Instead of having to redirect users to another page like previously, Facebook now gives you the option to set your objective to collect user based information through lead forms quite similar to that of a landing page.
With this new dimension to Facebook adverts, it allows customers to sign up for your offers anywhere at any time. It allows users to fill in the appropriate details required to follow up. This includes price estimates, newsletters and so on. What’s more, is that these adverts are mobile-friendly and allow as little typing as possible. This makes it much more efficient and effective in nature.
How it Works
It’s no surprise that people today spend a majority of their time connected socially. Mobility has made that possible in a number of ways that it’s accessible to almost everyone. The idea of such lead ads is to make asking a question, a lot simpler and intuitive.
With Facebook’s efficient targeting, it allows you, the marketer to reach those most likely to be interested in what your product or service has to offer. This as most of you are mostly aware, translates into high-quality leads. Facebook makes all of this possible:
- You can customize your form to acquire information that’s most essential to your business.
- You can conduct inbound inquiries, subscriptions, orders and registrations much like any other landing page.
- You can follow up with those most likely to purchase what you have to offer.
- Such information can be used to create specific audiences that can prove essential from a remarketing point of view.
Getting Started
If you’ve worked with advertising on Facebook, you’re probably already aware of how to create a basic campaign. Facebook’s new layout has provided us with new objectives and options to go about it. Here’s the breakdown:
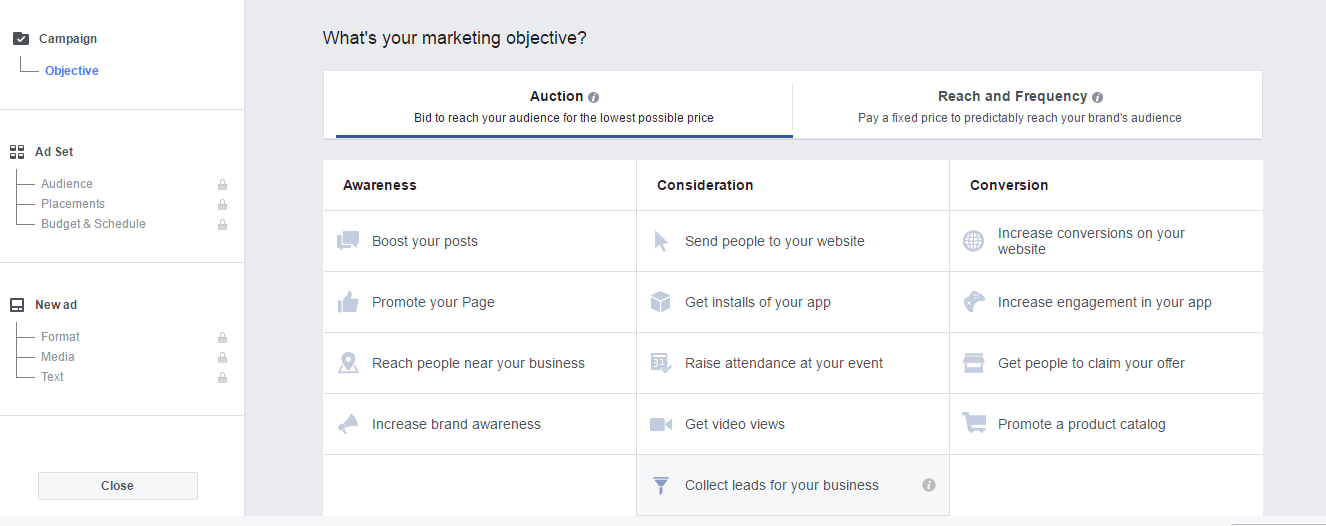
Step 1
Upon accessing the ads manager in your account, you’ll be prompted to set up the basic objective of your ad from here. Select “Collect leads for your business” as lead forms can only be used here.
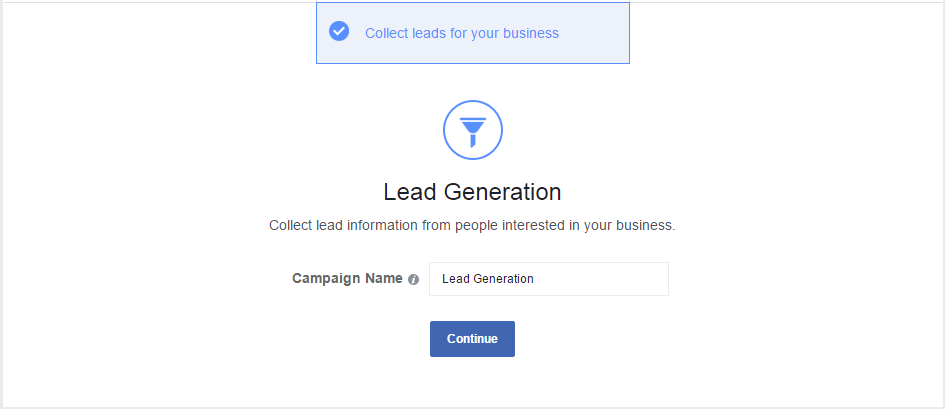
Step 2
From there on, you can proceed to naming your campaign which follows suit like any other ad campaign you’ve already created.
Step 3
Once you’ve decided on other variables such as targeting, budget and even ad headlines and images, you will be greeted with another option at the bottom of this section to choose a lead form. Assuming you haven’t done one already, proceed to create one.

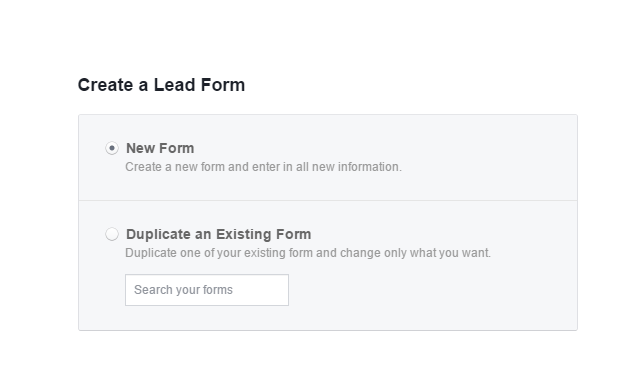
Step 4
From there on, you will be greeted by a window that gives you the choice of creating your own lead form or using a pre-created one for reference. Since you haven’t yet created one in the past, the option will be greyed out. Proceed with a new form.
Step 5
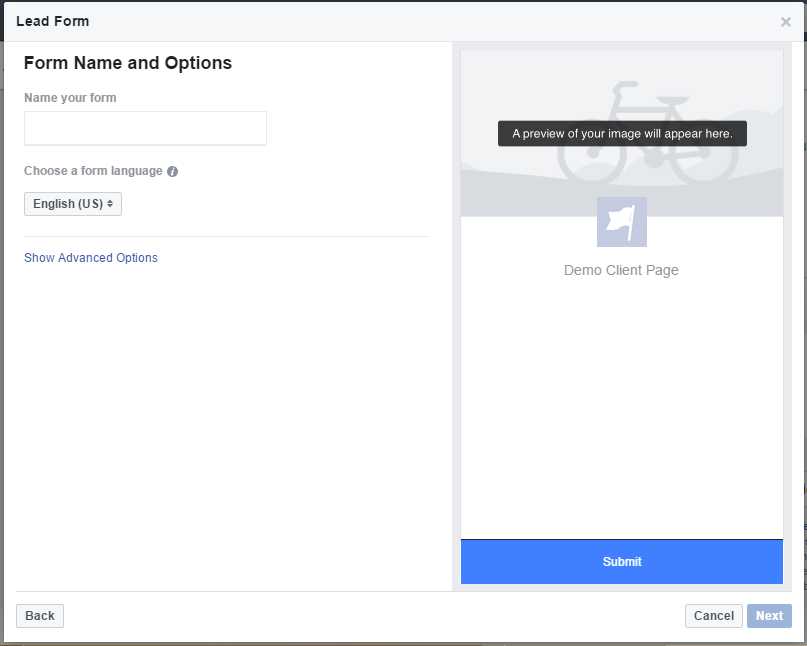
As with creating anything for the first time, you will be prompted to first name your lead form. We suggest going ahead with a name that’s easy to remember and more specifically, relative to your campaign. This makes it easy to refer to in the future should you decide to make duplicates based off this. Once you’ve decided a name, click next.
Step 6
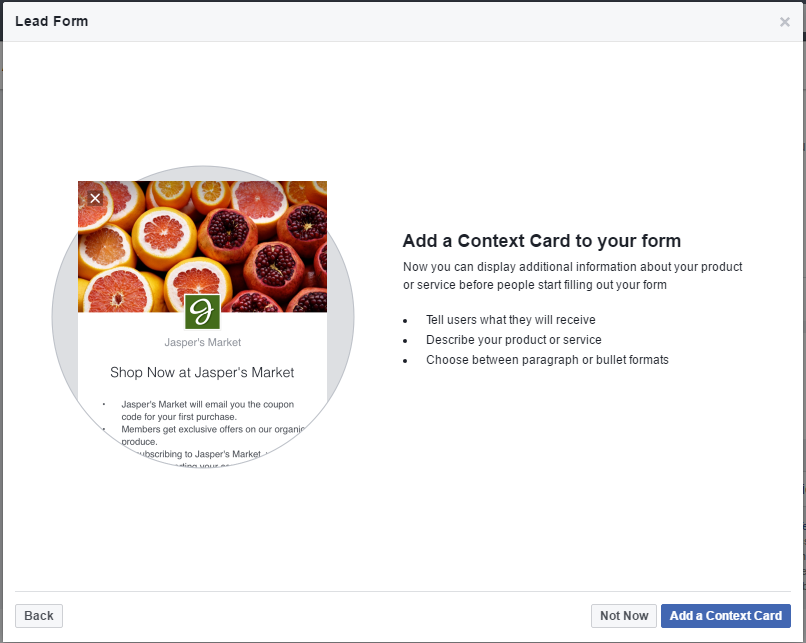
You will then be greeted with a message inviting you to add a context card to your form. Doing this can prove to be quite useful as it can provide clarity in context to the product or service offering. It’s best to always add a context card to your lead form as it provides the customer with the necessary information.
Step 7
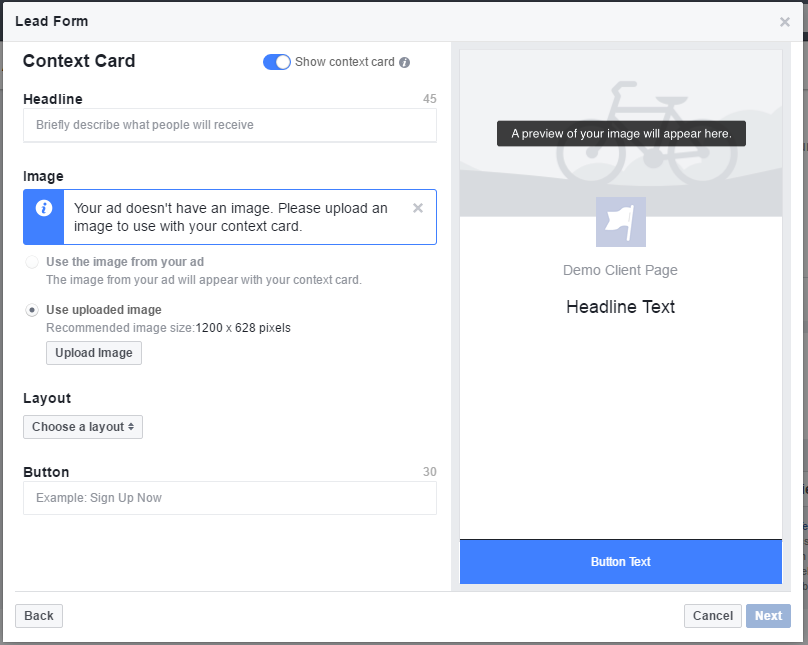
Should you decide to create a context card, you will be given the chance to create it anyway you choose. This involves adding descriptions either in the form of paragraphs or bullet points as a layout. You can also give it a catchy headline accompanied by an image reminiscent of your ad image.
Step 8
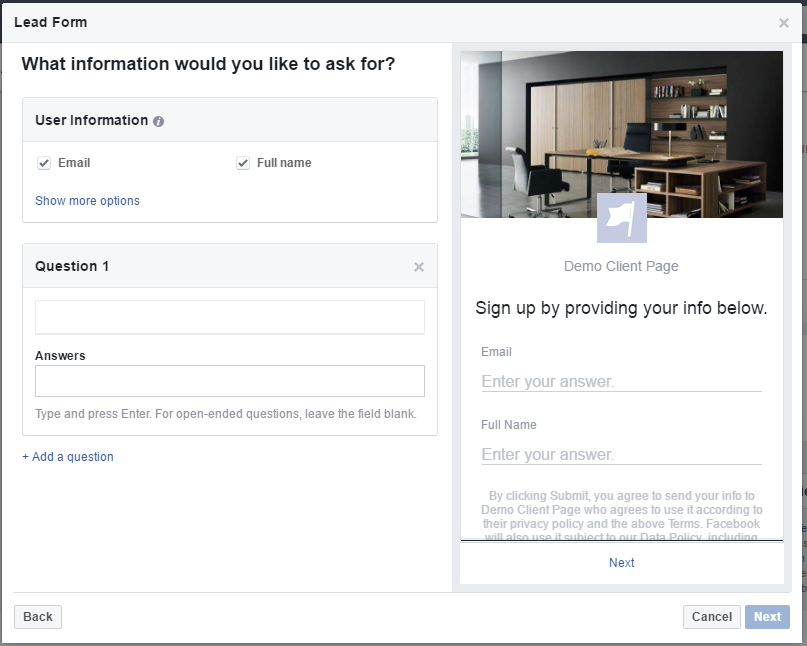
Once you’ve moved on from deciding the content for your context card, you will then be proceeded to deciding your lead form layout. From here, Facebook gives you the option of choosing basic questions such as name, contact number, email ID and so on. You can also add custom questions of your own in the form of choices and close ended questions. Be sure to keep your questions as minimal as possible since the objective is to collect information and not conduct a questionnaire.
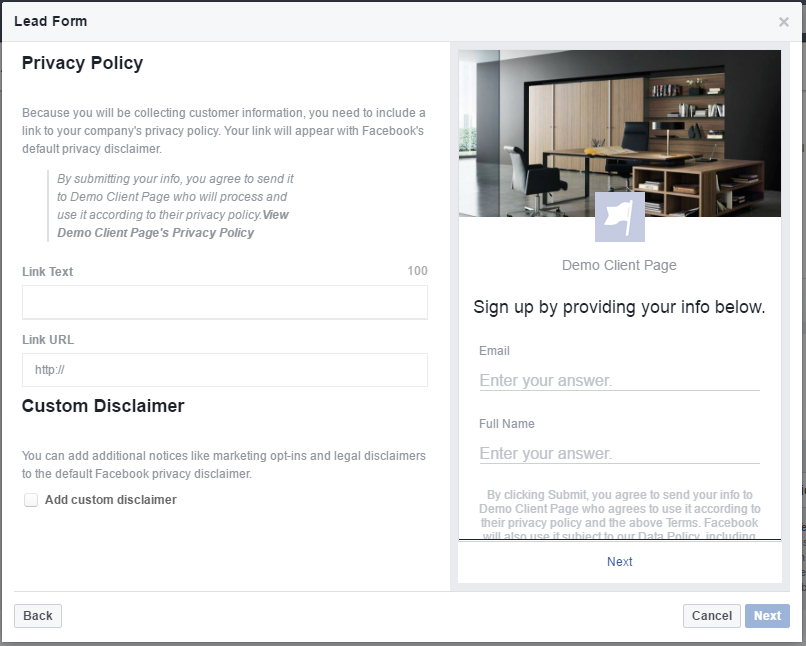
Step 9
Once you’ve officially settled on your lead form, you will then proceed to a privacy policy section. Since you are collecting official data, this will be a mandatory step in creating a policy URL that links directly to your company’s privacy policy page. It’s best to proceed with this step to avoid any legal issues in the future should any unforeseen circumstances present themselves.
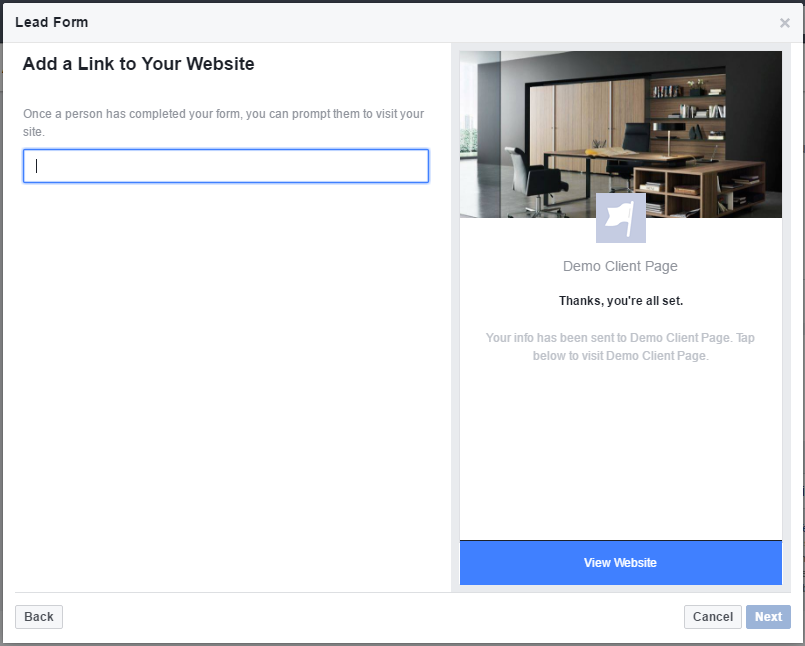
Step 10
Once you’ve completed the privacy policy section, you will be prompted to enter a destination URL. From here, you can use your company’s website URL. This is so that once a user has completed filling in your lead form, he/she will be prompted by Facebook to visit your website. This is good as it allows users to check up on other products and services offered by your company.
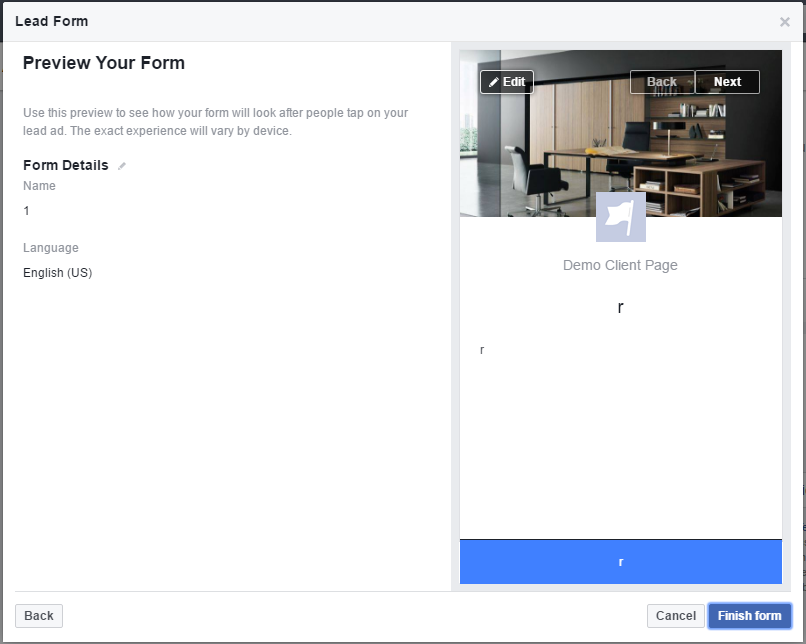
Step 11
Once you’ve completed these steps, you will then be shown a preview of your entire lead form. This allows you to double check any details for mistakes and even allows you to move back and make any necessary changes should the need present itself. Once you’ve taken a look at the preview and have made any revisions, you can proceed to finishing your lead form.
That quite sums it up when it comes to creating your lead generation campaign. It may first seem like a daunting task but rest assured that the overall process is quite simple albeit a timely one. Remember to monitor your leads from your pages Publishing Tools.